What is a Résumé?
A résumé, often referred to as a CV (curriculum vitae), is a summary of a person’s background and experience, including work experience, education, and even volunteer work, and its most common use is to send to potential employers when searching for a new career opportunity. In fact, though taking on a much different form than that of what you’d expect a résumé to look like today, Leonardo Da Vinci even did this himself, and he is often given credit as the first person to create a resume.
Of course, the résumé has undergone quite the transformation since Da Vinci’s 1482 version, drastically so during the age of word processors and digital typesetting in the 1970’s—40 years after résumés became an institution. Fast-forward to today and not only do you have your standard .doc or .pdf résumé, but you’ll also see people uploading video résumés on YouTube and using social media platforms like LinkedIn to sell themselves to companies.
We should be thankful for these developments because now we can skip the quill and ink and jump straight into Microsoft Word.
Using a Microsoft Word Résumé Template
Microsoft Word offers a bunch of résumé templates. Some are beautiful; some are not. We’ll let you decide which style fits you best, but here’s where you can find them.
Go ahead and open Word. As soon as you do, you’ll be greeted with several different templates to choose from, ranging from a simple blank document, cover letters, résumés, or even seasonal event flyers. Click the “Resumes and Cover Letters” link under the search box to see only those types of templates.

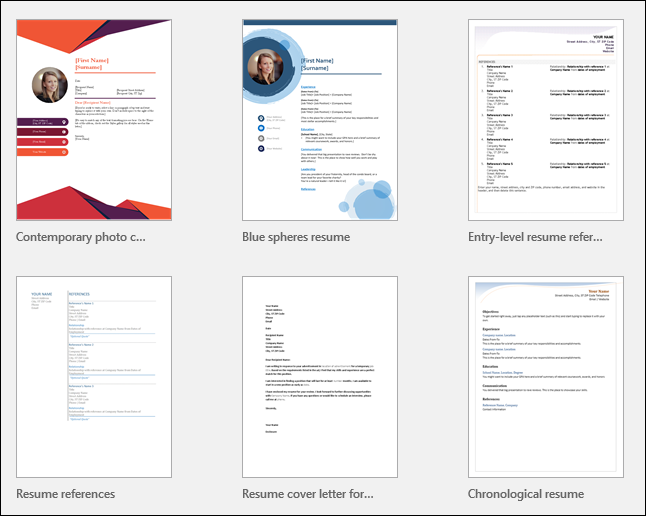
Now, you’ll see all the different resume styles Word has to offer. There are a lot of different styles and color schemes to choose one, so pick what feels right. If you scroll down the list a bit, you’ll also see some plainer resume templates designed for different purposes—like an entry-level, chronological, or extended CV style.
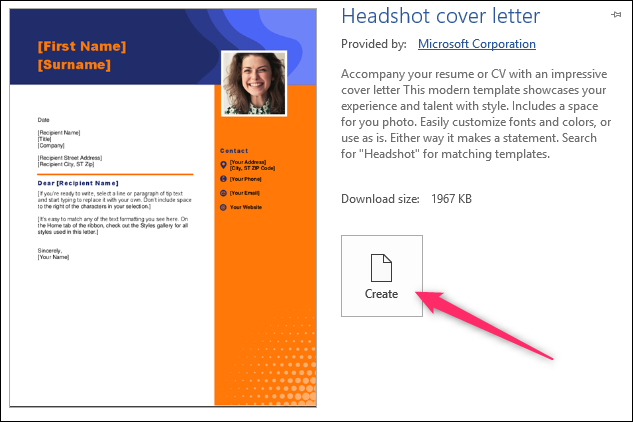
Some of the templates are already built into Word; others are a quick, free download from Office.com (and you won’t even have to leave Word to grab them). When you click to create a resume, Word will let you know the download size (if it needs to download the template). Click the “Create” button and a few seconds later, you’ll be in your document and ready to edit.
That’s all there is to it! But what if you didn’t find a résumé you liked? Luckily, Word has a few formatting tools to help you craft the perfect résumé.
Crafting a Custom Résumé in Microsoft Word
Before we start, it’s important to know that each résumé should reflect a person’s personal experience and education. Since everyone’s experience is different, it’s no surprise that their résumés will be too.
That being said, there are some general aesthetic guidelines for making a résumé that we highly recommend you follow.
Go ahead and open up a clean, blank document in Word.
The first thing we’ll want to do is set our margins. Go to the “Layout” tab and click the “Margins” buttons.

The drop-down menu displays several different margin options from which to choose. If you can’t find the one you’re looking for, you can click “Custom Margins” at the bottom and enter your specifications. Let’s go ahead and do that.

According to the experts, the best margin size is 1” for the top and bottom and 0.63” for the sides. This may seem like an oddly specific number, but the objective is to get as much (relevant) information about yourself as possible on a page without overwhelming the reader. With the above credentials, we leave enough white space on the page for the reader to not feel suffocated.
Click “OK” once you’ve entered the margin sizes you want.

Deciding What Information To Include
Now that our margins are set, it’s time to start inputting information.
The information you put mainly depends on what you’re trying to accomplish and where you are in your professional career. If you have over two years of working experience, then detailing that information is much more valuable than which high school you graduated from or which clubs you were a part of in college. Like a cover letter, your résumé should uniquely cater to the recipient. Dress to impress.
So, which information should you put? We’ll give you the overview, and you can decide which areas you should detail.
- Contact Information
- Professional Experience (It’s also ok to include any volunteer work at the bottom of this section)
- Education
- Additional Skills
For all of these, tailor the information to the job. You don’t need to fit irrelevant work experience in there unless not including it would create a gap in your work experience. But if you’re applying for a job as an accountant, nobody cares that you delivered pizzas 12 years ago. And you do list out any additional skills, make sure they’re relevant to the position for which you’re applying. Your high school friend might be impressed by how high you can kick, but your future employer—not so much.
Another thing to remember is that you should always list out your experience in reverse chronological order. That is, list out your most recent experience first, and go back from there.
Organizing That Information
There’re several ways to do this, but arguably the most effective way is by creating headings and then inserting a table for the content of each section. By doing so, you’re not only able to move content around in groups instead of individually, which can be a headache in itself, but you’re also able to give your résumé a unique touch by adding table designs. In the image below, for example, we’ve added a dashed border to the left side of the table to create a nice little visual element to tie the different experience elements together.

First things first, let’s go ahead and find a heading that we like. In the “Styles” section of the “Home” tab, you’ll find several default styles. If you can’t find one you like, then Word has a feature that lets you create your own. First, click the “More” arrow on the right-hand side of the different built-in styles.

You’ll see a menu with three different options. Go ahead and click “Create a Style.”

The “Create New Style from Formatting” window will appear. The only thing you can do here is to name the style, so click “Modify.”

Now you should see a window with many formatting options. For fonts, there’s no best option. Just make sure you use something that’s clean and readable. “Georgia” is a great example. A 14 pt font size is fine for headings, but make sure it’s bold so that each section is easier to find for the reader.
The “Add to the Styles gallery” option will automatically be selected. It’s good to leave this option selected so you’ll have easy access to your heading for the other sections of your résumé. If you plan to use this heading again in future documents, you can go ahead and deselect “Only in this document,” but since we only plan to use it for our résumé, we’ll keep that option selected.
Click “OK.”

Go ahead and type in your first heading and apply the new style to it. In this example, we’ll use “Experience” first.
Now, let’s use a table under our first heading so that we can keep all our content lined up correctly. Place your insertion point on the line under your new heading, switch to the “Insert” tab, and click the “Table” button.

You’ll see a 10×8 grid on the drop-down menu. You can create the table size by moving your mouse over the grid and clicking when it’s the size you want. For your résumé, you’ll need one column and enough rows to contain the separate pieces of information you have to list. For example, if you have three prior jobs to list in the Experience section, you’ll want a table that’s 1×3.

And here’s what it looks like after we’ve inserted the table into the document.

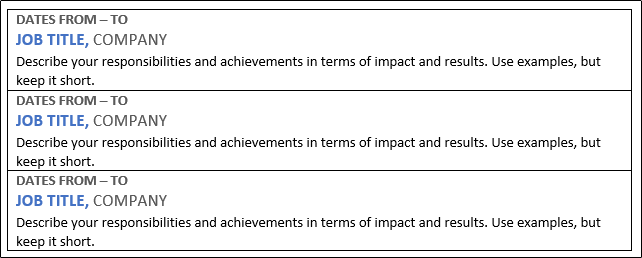
We’ll remove the border lines later. First, go ahead and put in your information. You’ll want the “Job Title, Company” text to be 1 or 2 pts larger than the rest of the text but be sure to keep it smaller than the heading of the section. If you want your job title to stand out, you can change the color or make it italic, but try to keep it simple.
Once that’s ready, let’s go ahead change the borders of our table. Select the table by placing your insertion point anywhere inside it. Switch to the “Design” tab in the “Table Tools” section of the Ribbon, and then click the “Borders” button.

If you want to keep it simple and remove all the lines of your table, select “No Border.” In this example, we’re going to give our table a little flavor, so we’ll select “Borders and Shading.”

Because we only want to customize the left border of our table, we will select “Custom” under the “Setting” section. This lets us use the “Preview” section to deselect the sides on which we don’t want borders. Click the boxes surrounding the preview to turn off all the borders except for the left one.
In the “Style” list, you can select the border design, color, and width you want. Click “OK” when you’re ready.

Now we should have an experience section on our résumé that’s starting to shape up. A little playing with colors and maybe spacing the table rows a bit, and you should be ready to go.